
Initial Consultation and Inspection
The reroofing process typically begins with a consultation and inspection from a roofing contractor. This is an essential step in determining the condition of your roof and identifying any areas that require attention. During this visit, the contractor will assess the roof’s structure, materials, and overall condition. They will check for issues such as leaks, damaged shingles, or signs of water damage. Based on this evaluation, the contractor will recommend the appropriate roofing materials and determine if a full reroofing or just repairs are necessary.
The inspection may also involve an evaluation of the underlying layers of the roof. Some roofs may need to be stripped down to the decking to assess the condition of the underlying structure, which could impact the overall cost and scope of the project.
Choosing Roofing Materials
Once the inspection is complete, the next step is selecting the materials for your new roof. There are various types of roofing materials to choose from, each offering different benefits in terms of aesthetics, durability, and cost. Common options include asphalt shingles, metal roofing, clay tiles, and slate. The choice of material will depend on factors such as climate, budget, and personal preference.
Your roofing contractor will guide you through the selection process, helping you understand the pros and cons of each material. They may also recommend specific brands or styles based on your home’s architecture and your long-term needs.
Preparing for the Reroofing Project
Before work begins, preparation is key. The roofing contractor will outline any necessary steps to prepare your home and property. You may need to move vehicles out of the driveway to allow room for equipment and materials. It’s also a good idea to remove any outdoor furniture or decorations near the work area to avoid damage. Additionally, the contractor will likely inform you of any areas that may be off-limits during the project, such as access to your attic or certain parts of the yard.
During this preparation phase, the contractor will also secure any necessary permits if required by your local building code. They will inform you of any regulations that must be followed, especially if your roof is being replaced with a different material or style.
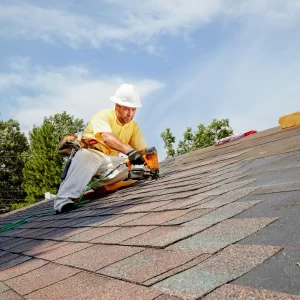
The Reroofing Process Begins
Once all preparations are in place, the actual reroofing work can begin. This step involves removing the old roofing materials, including shingles, tiles, or metal sheets. The removal process can be noisy and messy, so it’s important to understand that some disruption to your daily routine is expected. The old materials will be hauled away, and the roof will be stripped down to the decking or underlayment.
After the removal, the contractor will inspect the decking and any other underlying structures for damage or rot. If repairs are needed, they will be completed before the new roofing materials are installed. This step ensures that the foundation of the roof is sound and ready to support the new materials.
Installing the New Roof
With the foundation secure, the roofing team will begin the process of installing the new materials. The specific installation steps will vary depending on the type of roofing material chosen, but the general process includes applying underlayment, followed by the shingles or other chosen materials. The underlayment acts as a moisture barrier, protecting the roof from leaks and water damage.
For shingles, each row is carefully installed to ensure proper overlap and alignment. If you’ve chosen a more complex roofing material like tiles or metal, the process will involve precise placement and securing of each component to create a seamless and durable finish. The contractor will also install flashing around chimneys, vents, and other roof penetrations to prevent water from seeping into these vulnerable areas.
Final Touches and Cleanup
Once the roofing material is in place, the roofing crew will finish the project by installing any final components, such as ridge vents, flashing, or trim. These elements are important for the overall functionality and aesthetics of the roof.
After installation, the crew will clean up the work area, removing any debris, nails, or leftover materials. This cleanup is crucial not only for safety but also for ensuring that your property is left in good condition. You may want to take a walk around the yard to ensure everything has been properly cleaned up and check the roof to confirm that no stray nails or materials remain.
Inspection and Final Walkthrough
After the reroofing process is complete, the roofing contractor will typically perform a final inspection. This is an important step to ensure that everything has been installed correctly and meets the necessary standards. They will check for any issues, such as improperly aligned shingles or areas that may require further attention. This is also the time for you to ask any lingering questions and ensure you are satisfied with the result.
The contractor will also provide you with maintenance instructions for your new roof, which may include advice on cleaning, inspection schedules, and general care to maximize its lifespan.